Budget-Friendly Cheesy Mushroom Herb Omelet Meal Prep
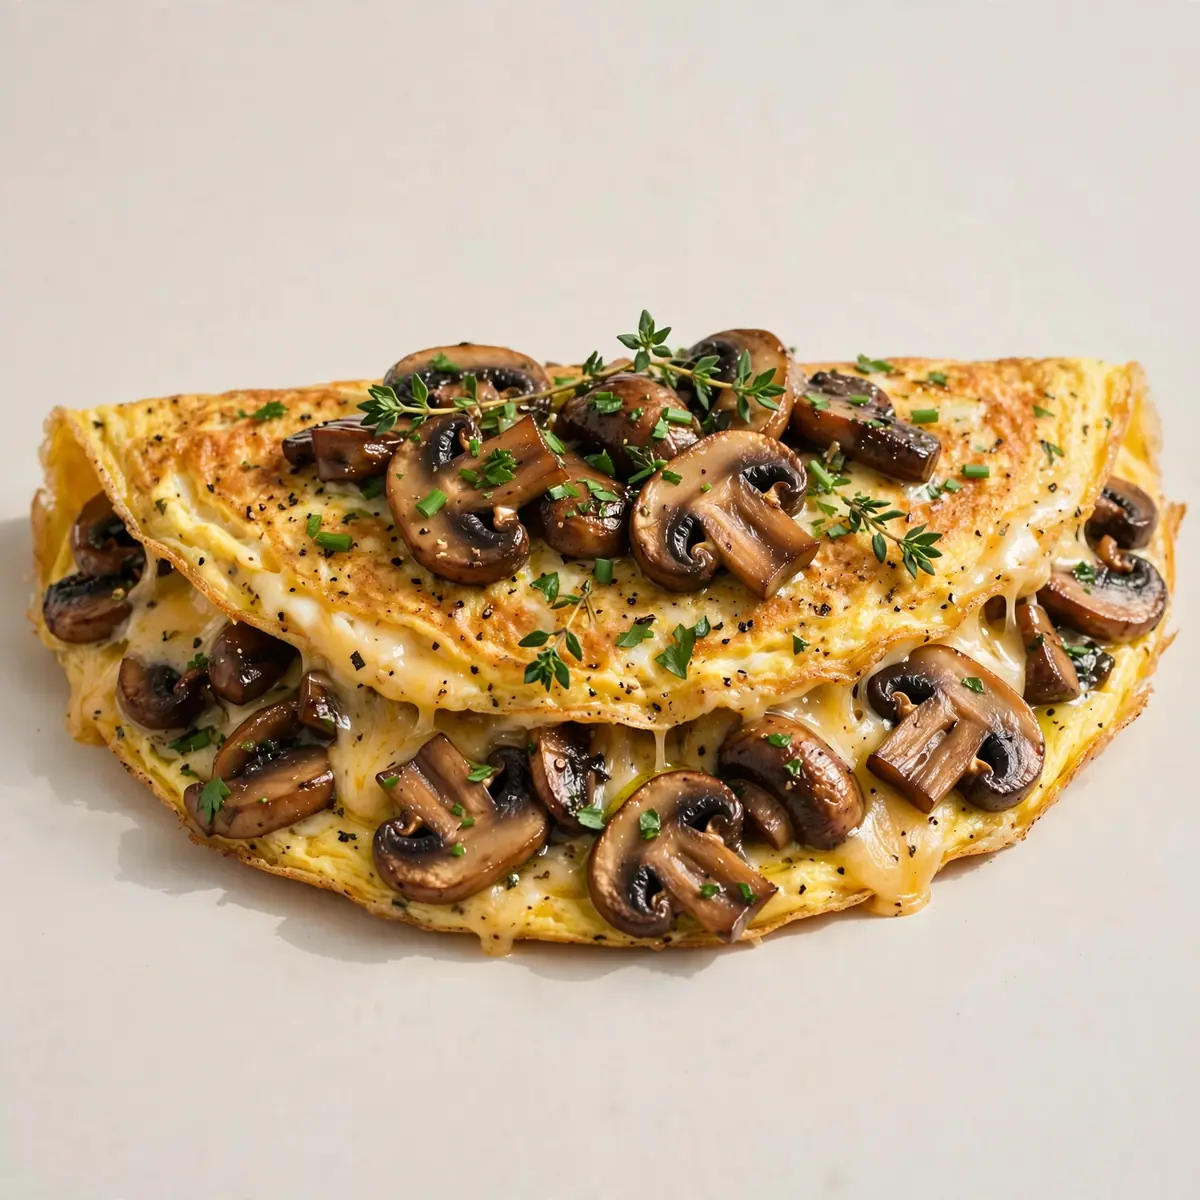
I’ve turned the simple omelet into my secret weapon for slashing the weekly food budget, and this cheesy mushroom and herb version is the one I come back to again and again. By batch-cooking a stack of these on a Sunday, I get four or five satisfying meals for about the same cost as a single sad shop-bought sandwich.
Recipe Overview
- Prep Time: 5 minutes
- Cook Time: 8 minutes per omelet
- Total Time: 13 minutes per omelet (about 45 minutes for a batch of 4)
- Servings: 1 per omelet (easily multiplied)
- Difficulty: Easy
Why You’ll Love This Cheesy Mushroom and Herb Omelet
- Budget-friendly hero: At roughly 65p per serving, this omelet costs less than a loaf of bread and uses ingredients you likely already have in the fridge.
- Batch-cooks like a dream: Make four or five at once, store them properly, and you’ve got breakfast, lunch, or a light dinner sorted for the working week.
- Reheats beautifully: Unlike many egg dishes that turn rubbery, this omelet stays tender when reheated gently — no sad, microwaved disappointment here.
- Packs a protein punch: Each serving delivers around 20g of protein, keeping you full until your next meal and helping you avoid expensive, impulse snacks.
- Endlessly adaptable: Use whatever mushrooms are on offer, swap the herbs for what’s growing in your garden, and change the cheese to match your mood or the contents of your cheese drawer.

Ingredients You’ll Need
- 3 large free-range eggs
- 100g chestnut mushrooms, sliced
- 30g mature cheddar cheese, grated
- 1 tablespoon fresh chives, finely chopped
- 1 tablespoon fresh parsley, finely chopped
- 1 small clove garlic, minced
- 1 tablespoon unsalted butter
- Salt and freshly ground black pepper, to taste
- 1 teaspoon olive oil (for the mushrooms)
- Splash of milk (optional, for a softer texture)
Tip: Buy mushrooms in bulk when they’re on offer — they freeze brilliantly. Just slice them straight from frozen and cook them in the pan; no need to thaw first.
How to Make Cheesy Mushroom and Herb Omelet
- Sauté the mushrooms: Heat the olive oil in a large non-stick frying pan over medium-high heat. Add the sliced mushrooms and cook for 3–4 minutes, stirring occasionally, until they release their moisture and turn a deep, golden brown. You’ll hear a gentle sizzle at first, then a quieter hiss as the water evaporates. The mushrooms should look glossy and smell deeply savoury.
- Add the garlic and herbs: Reduce the heat to medium, add the minced garlic, and cook for 30 seconds until fragrant — your kitchen will suddenly smell wonderfully aromatic. Stir in half the chopped chives and parsley, then remove the mushroom mixture from the pan and set it aside.
- Whisk the eggs: Crack the eggs into a mixing bowl, add a splash of milk if using, and season with salt and pepper. Whisk vigorously for about 30 seconds until the mixture is pale yellow, frothy on top, and completely uniform. You’re looking for a smooth, single-colour liquid with tiny bubbles across the surface.
- Melt the butter: Wipe the pan clean with kitchen paper, then return it to medium heat. Add the butter and let it melt slowly, tilting the pan to coat the base. When the butter stops foaming and smells nutty, you’re ready to pour in the eggs.
- Cook the omelet base: Pour the whisked eggs into the centre of the pan. Let them sit undisturbed for 20 seconds until the edges start to set and turn a pale, opaque yellow. Using a spatula, gently push the cooked edges toward the centre while tilting the pan to let the uncooked egg run to the edges. Repeat this once or twice until the top is still slightly wet and custard-like.
- Add the filling: Spoon the cooked mushrooms evenly over one half of the omelet. Sprinkle the grated cheddar cheese on top, followed by the remaining fresh herbs. The cheese should look like a golden blanket over the mushrooms.
- Fold and finish: Using your spatula, carefully fold the empty half of the omelet over the filling. Let it cook for another 30–40 seconds until the cheese is melted and the bottom is a light golden brown — you’ll see a few brown spots on the surface. Slide the omelet onto a plate and serve immediately, or set aside to cool for batch storage.
Tips From My Kitchen
- Don’t overcook the mushrooms: The key to a deeply savoury flavour is letting the mushrooms brown properly. If you crowd the pan or rush the process, they’ll steam rather than caramelise, leaving you with grey, watery mushrooms instead of rich, golden ones. Give them space and patience.
- Use room-temperature eggs: Cold eggs straight from the fridge can make the omelet cook unevenly. Take them out 10 minutes before you start whisking, or run them under warm water for a minute. The result is a more tender, even curd that doesn’t toughen up.
- Low and slow for the omelet: Medium heat is your friend here. High heat will brown the outside before the inside sets, leaving you with a burnt exterior and a runny centre. You want the egg to cook gently so it stays soft and silky throughout.
- Grate your own cheese: Pre-grated cheese often contains starches and anti-caking agents that prevent it from melting smoothly. Grating a block of cheddar yourself takes 30 seconds and ensures a luscious, gooey melt that stretches beautifully when you cut into the omelet.
- Batch storage is all about cooling: If you’re making multiple omelets for the week, let each one cool completely on a wire rack before stacking them between sheets of baking paper. Trapping steam in a container will make them soggy — and nobody wants a wet omelet on Wednesday morning.
- Reheat gently: The microwave works, but use 50% power in 30-second bursts to avoid turning your omelet into rubber. For the best texture, reheat in a dry non-stick pan over low heat for about 90 seconds on each side — the outside crisps up slightly while the inside stays tender.
Equipment You’ll Need
- Large non-stick frying pan or skillet (20–25cm works best)
- Sharp knife and cutting board
- Mixing bowls (one for eggs, one for mushrooms)
- Wooden spoon or heat-resistant spatula
- Wire cooling rack (for batch storage)
- Baking paper (for layering stored omelets)
Delicious Variations to Try
- Spicy Version: Add a finely chopped red chilli or a generous pinch of smoked paprika to the mushrooms as they cook. The warmth of the spice cuts through the richness of the cheese beautifully — my kids actually love this version, despite the heat.
- Vegetarian/Vegan Option: For a fully plant-based take, use a firm tofu scramble instead of eggs (crumble 150g tofu and sauté with turmeric, black salt, and nutritional yeast). Replace the cheese with a dairy-free melting variety, and use coconut oil or a vegan butter alternative.
- Different Protein: Leftover shredded chicken or turkey works a treat here — add about 50g to the mushroom mixture before folding. For a heartier meal, try it with the shredded chicken from my Cost Saving Shredded Mexican Chicken Bowls With Avocado Crema — it’s a brilliant way to use up leftovers from that recipe.
What to Serve With Cheesy Mushroom and Herb Omelet
- A simple green salad with a sharp lemon vinaigrette — the acidity balances the richness of the cheese and eggs.
- Buttered sourdough toast or crusty wholemeal bread for soaking up any oozy cheese.
- Roasted cherry tomatoes on the vine — their sweetness is a lovely contrast to the earthy mushrooms.
- A handful of rocket leaves dressed with balsamic vinegar for a peppery kick.
- If you’re after something more substantial, serve it alongside a portion of Budget Friendly Creamy Pesto Chicken With Roasted Cauliflower for a double-protein dinner that costs pennies per serving.
Still hungry for ideas? You might also love Herb Roasted Chicken In Creamy White Sauce With Mushroom And Potatoes Cozy Dinner Recipe Under A Tin Roof from our sister kitchens.
Frequently Asked Questions
Cheesy Mushroom and Herb Omelet
Ingredients
Method
- Sauté the mushrooms: Heat the olive oil in a large non-stick frying pan over medium-high heat. Add the sliced mushrooms and cook for 3–4 minutes, stirring occasionally, until they release their moisture and turn a deep, golden brown. You’ll hear a gentle sizzle at first, then a quieter hiss as the water evaporates. The mushrooms should look glossy and smell deeply savoury.
- Add the garlic and herbs: Reduce the heat to medium, add the minced garlic, and cook for 30 seconds until fragrant — your kitchen will suddenly smell wonderfully aromatic. Stir in half the chopped chives and parsley, then remove the mushroom mixture from the pan and set it aside.
- Whisk the eggs: Crack the eggs into a mixing bowl, add a splash of milk if using, and season with salt and pepper. Whisk vigorously for about 30 seconds until the mixture is pale yellow, frothy on top, and completely uniform. You’re looking for a smooth, single-colour liquid with tiny bubbles across the surface.
- Melt the butter: Wipe the pan clean with kitchen paper, then return it to medium heat. Add the butter and let it melt slowly, tilting the pan to coat the base. When the butter stops foaming and smells nutty, you’re ready to pour in the eggs.
- Cook the omelet base: Pour the whisked eggs into the centre of the pan. Let them sit undisturbed for 20 seconds until the edges start to set and turn a pale, opaque yellow. Using a spatula, gently push the cooked edges toward the centre while tilting the pan to let the uncooked egg run to the edges. Repeat this once or twice until the top is still slightly wet and custard-like.
- Add the filling: Spoon the cooked mushrooms evenly over one half of the omelet. Sprinkle the grated cheddar cheese on top, followed by the remaining fresh herbs. The cheese should look like a golden blanket over the mushrooms.
- Fold and finish: Using your spatula, carefully fold the empty half of the omelet over the filling. Let it cook for another 30–40 seconds until the cheese is melted and the bottom is a light golden brown — you’ll see a few brown spots on the surface. Slide the omelet onto a plate and serve immediately, or set aside to cool for batch storage.
Notes
I make this at least once a week — it’s become a family favourite that saves us a small fortune on lunches. My kids absolutely devour it every time I make it, especially when I sneak in a handful of spinach alongside the mushrooms. If you give this budget-friendly omelet a go, I’d love to hear how you customise it. Drop a comment below and share your favourite fillings — I’m always on the lookout for new ideas to keep the weekly meal prep interesting. For more cost-saving recipes, have a browse through my Dinner Recipes or the full All Recipes collection.